 |
ac5wzw00002380
TRANSFER REMOVAL/INSTALLATION [GW6AX-EL]
id0316g3800600
1. Disconnect the negative battery cable. (See NEGATIVE BATTERY CABLE DISCONNECTION/CONNECTION [SKYACTIV-D 2.2].)
2. Remove the propeller shaft. (See PROPELLER SHAFT REMOVAL/INSTALLATION.)
3. Remove the front crossmember component. (See FRONT CROSSMEMBER REMOVAL/INSTALLATION.)
4. Remove the front drive shaft (RH). (See FRONT DRIVE SHAFT REMOVAL/INSTALLATION.)
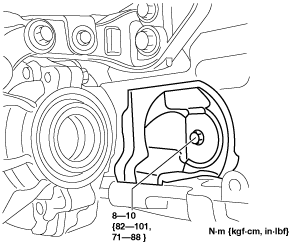
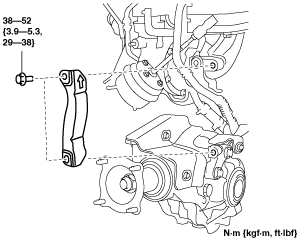
5. Remove the turbocharger bracket.
ac5wzw00002380
|
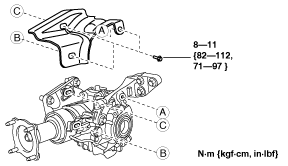
6. Remove the seal rubber.
am6zzw00014771
|
7. Remove the heat shield.
am6zzw00014772
|
8. Install in the reverse order of removal.
9. Warm up the engine and transaxle, inspect for oil leakage, and inspect the transfer operation.
ac5wzw00002383
|
|
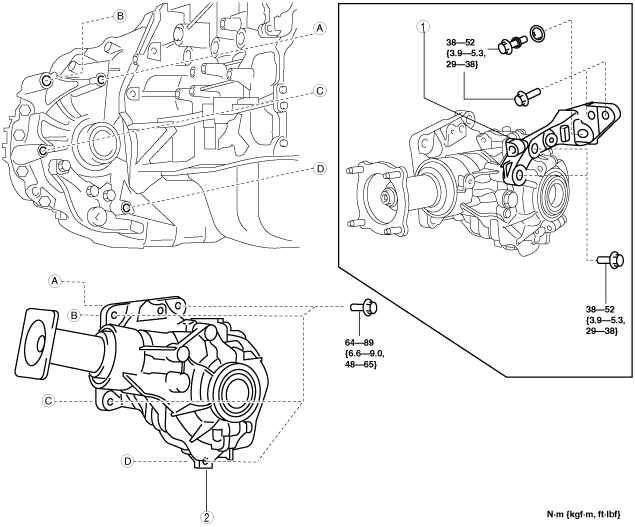
1
|
Transfer bracket
|
|
2
|
Transfer
|
Transfer Bracket Installation Note
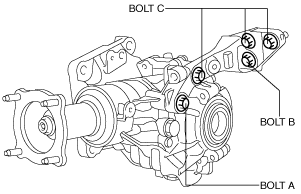
1. Install the transfer bracket to transfer, then temporarily tighten bolts A and B.
ac5wzw00002384
|
2. Tighten bolts B, A & C in this order.