 |
am6xuw00007786
FRONT DOOR MODULE PANEL REMOVAL/INSTALLATION
id091100520200
1. Perform the front door glass preparation. (See FRONT DOOR GLASS REMOVAL/INSTALLATION.)
2. Disconnect the negative battery cable. (See NEGATIVE BATTERY CABLE DISCONNECTION/CONNECTION [SKYACTIV-D 2.2].) (See NEGATIVE BATTERY CABLE DISCONNECTION/CONNECTION [SKYACTIV-G 2.0, SKYACTIV-G 2.5].) (See NEGATIVE BATTERY CABLE DISCONNECTION/CONNECTION [SKYACTIV-G 2.0, SKYACTIV-G 2.5 (WITHOUT i-stop)].)
3. Remove the following parts:
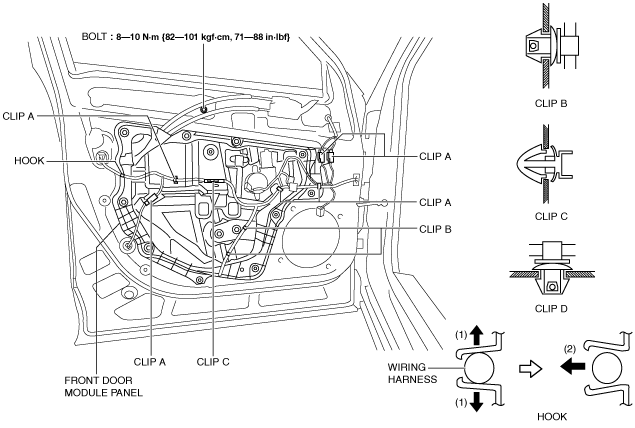
4. Remove bolt.
am6xuw00007786
|
5. Detach front door wiring harness securing clips A, B, and C.
6. Pull the door wiring harness in the direction of the arrow in the order of (1), (2) and remove it while detaching hook.
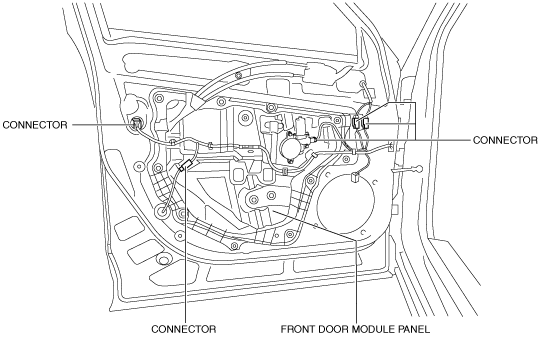
7. Disconnect the connectors shown in the figure.
ac5uuw00000843
|
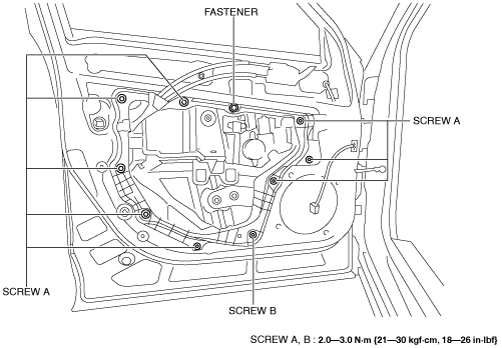
8. Remove screws A.
am6xuw00007787
|
9. Remove screw B.
10. Remove fastener.
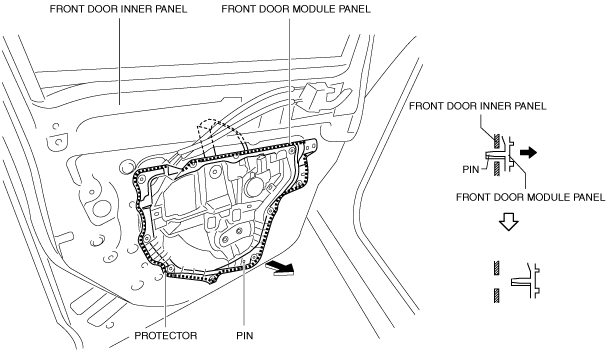
11. Pull the front door module panel in the direction of arrow shown in the figure and remove the protector and pin from the front door inner panel.
am6xuw00007788
|
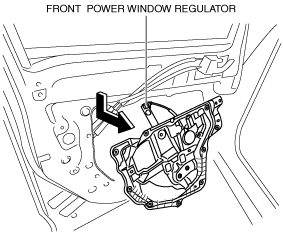
12. Move the front door module panel in the direction of arrow shown in the figure so that the upper part of the front power window regulator does not contact the front door inner panel, and remove the front door module panel and the front power window regulator as a single unit.
am6xuw00007789
|
13. Remove the front power window motor. (See POWER WINDOW MOTOR REMOVAL/INSTALLATION.)
14. Remove the front power window regulator. (See FRONT POWER WINDOW REGULATOR REMOVAL/INSTALLATION.)
15. Install in the reverse order of removal.