 |
POWER OUTER MIRROR REMOVAL/INSTALLATION
id091200002400
1. Disconnect the negative battery cable. (See NEGATIVE BATTERY CABLE DISCONNECTION/CONNECTION [SKYACTIV-D 2.2].) (See NEGATIVE BATTERY CABLE DISCONNECTION/CONNECTION [SKYACTIV-G 2.0, SKYACTIV-G 2.5].) (See NEGATIVE BATTERY CABLE DISCONNECTION/CONNECTION [SKYACTIV-G 2.0, SKYACTIV-G 2.5 (WITHOUT i-stop)].)
2. Remove the following parts:
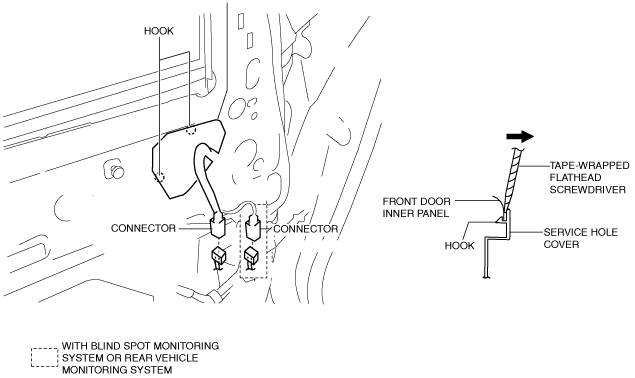
3. Insert a tape-wrapped flathead screwdriver into the service hole and remove hooks in the direction of arrow.
am6xuw00007813
|
4. Disconnect the connector.
5. Remove bolts.
am6xuw00007814
|
6. Pull the power outer mirror in the direction of the arrow while remove clips, pins.
7. Remove the power outer mirror.
8. Install in the reverse order of removal. (See Power Outer Mirror Installation Note.)
Power Outer Mirror Installation Note
1. If a wiring harness is mistakenly routed when installing a power outer mirror, it will interfere with the front door glass when opening/closing the front door glass, and could result in an open circuit. When routing the wiring harness, route it behind the glass guide.
am6zzw00009357
|