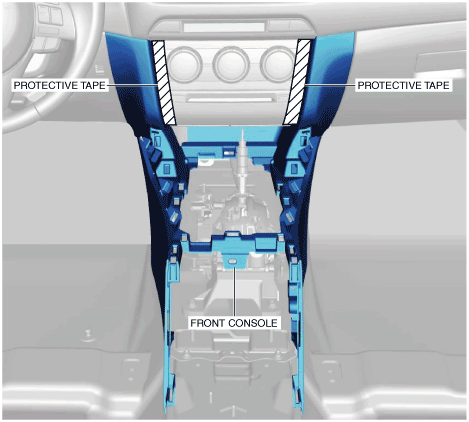
Caution
• Affix protective tape to the position shown in the figure.
am6xuw00007484
|
FRONT CONSOLE REMOVAL/INSTALLATION
id091700457400
am6xuw00007484
|
1. Disconnect the negative battery cable. (See NEGATIVE BATTERY CABLE DISCONNECTION/CONNECTION [SKYACTIV-D 2.2].) (See NEGATIVE BATTERY CABLE DISCONNECTION/CONNECTION [SKYACTIV-G 2.0, SKYACTIV-G 2.5].) (See NEGATIVE BATTERY CABLE DISCONNECTION/CONNECTION [SKYACTIV-G 2.0, SKYACTIV-G 2.5 (WITHOUT i-stop)].)
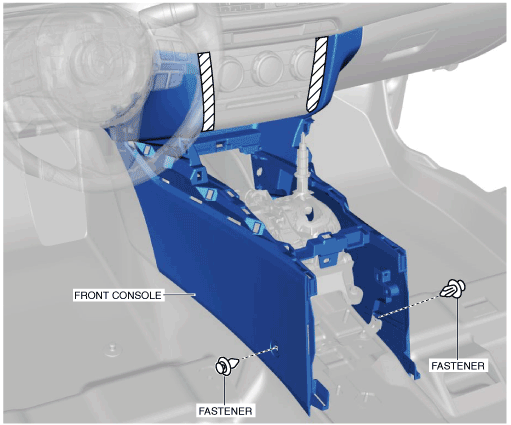
2. Remove the following parts:
3. Remove fasteners.
am6xuw00007485
|
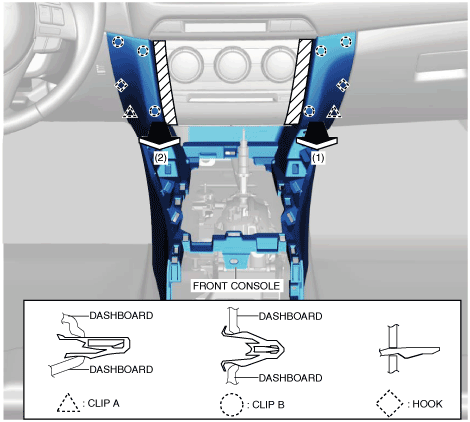
4. Pull the front console in the direction of the arrow in the order of (1), (2) and remove it while detaching clips A, clips B and hooks.
am6xuw00007486
|
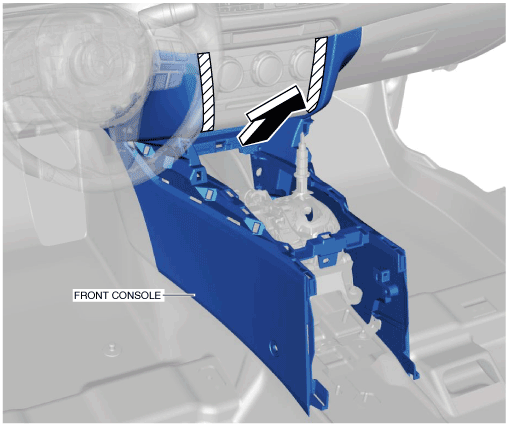
5. Remove the wiring harness clip.
6. Remove the front console in the direction of the arrow shown in the figure.
am6xuw00007487
|
7. Install in the reverse order of removal.