 |
am6zzw00013281
REAR PACKAGE TRIM REMOVAL/INSTALLATION
id091700802800
With Rear Sunshade
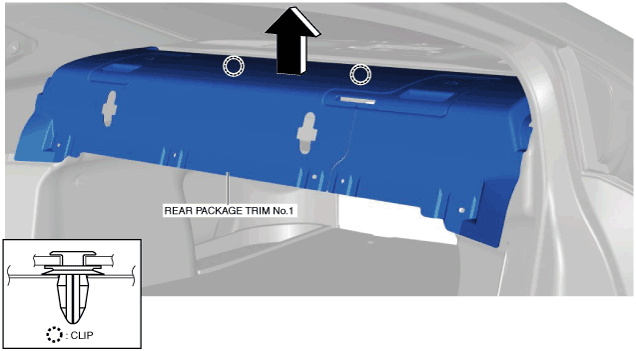
Rear package trim No.1
1. Disconnect the negative battery cable. (See NEGATIVE BATTERY CABLE DISCONNECTION/CONNECTION [SKYACTIV-D 2.2].) (See NEGATIVE BATTERY CABLE DISCONNECTION/CONNECTION [SKYACTIV-G 2.0, SKYACTIV-G 2.5].) (See NEGATIVE BATTERY CABLE DISCONNECTION/CONNECTION [SKYACTIV-G 2.0, SKYACTIV-G 2.5 (WITHOUT i-stop)].)
2. Lower the rear seat back.
3. Remove the following parts:
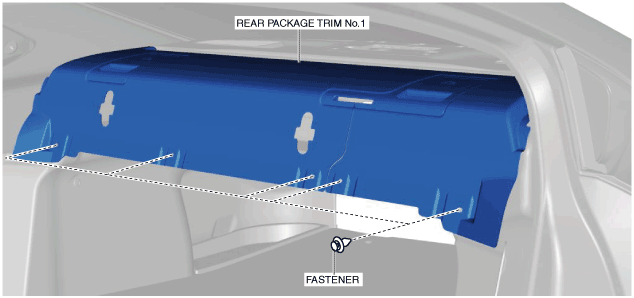
4. Remove fasteners.
am6zzw00013281
|
5. Remove the rear package trim No.1 in the direction of the arrow shown in the figure while detaching clips.
am6zzw00013282
|
6. Remove the rear package trim No.1.
7. Install in the reverse order of removal.
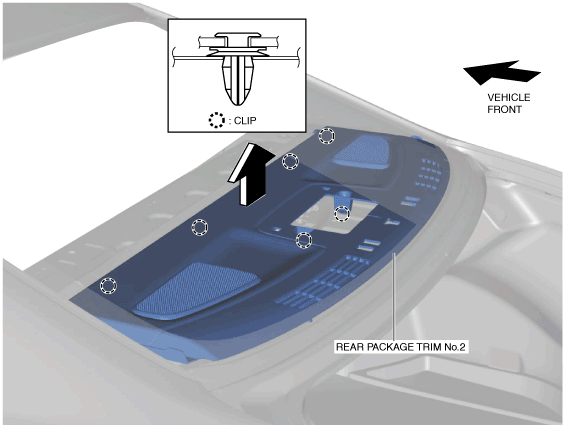
Rear package trim No.2
1. Disconnect the negative battery cable. (See NEGATIVE BATTERY CABLE DISCONNECTION/CONNECTION [SKYACTIV-D 2.2].) (See NEGATIVE BATTERY CABLE DISCONNECTION/CONNECTION [SKYACTIV-G 2.0, SKYACTIV-G 2.5].) (See NEGATIVE BATTERY CABLE DISCONNECTION/CONNECTION [SKYACTIV-G 2.0, SKYACTIV-G 2.5 (WITHOUT i-stop)].)
2. Lower the rear seat back.
3. Remove the following parts:
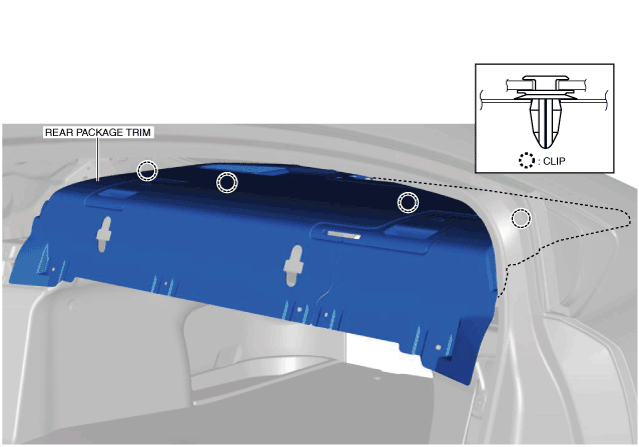
4. Remove the clips.
am6zzw00013283
|
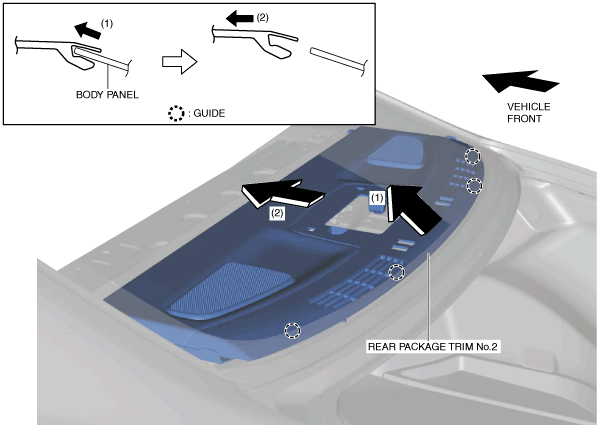
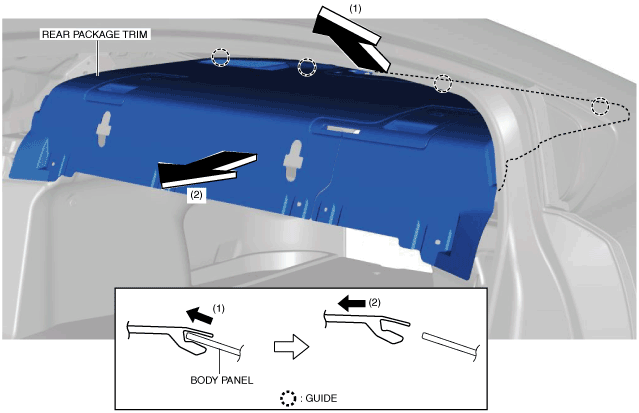
5. Pull up the rear package trim No.2 in the direction of the arrow (1) shown in the figure while remove the guides, pull the rear package trim in the direction of the arrow (2), and remove it.
am6zzw00013284
|
6. Install in the reverse order of removal.
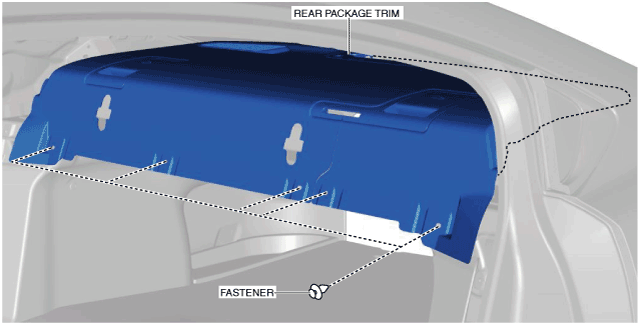
Without Rear Sunshade
1. Disconnect the negative battery cable. (See NEGATIVE BATTERY CABLE DISCONNECTION/CONNECTION [SKYACTIV-D 2.2].) (See NEGATIVE BATTERY CABLE DISCONNECTION/CONNECTION [SKYACTIV-G 2.0, SKYACTIV-G 2.5].) (See NEGATIVE BATTERY CABLE DISCONNECTION/CONNECTION [SKYACTIV-G 2.0, SKYACTIV-G 2.5 (WITHOUT i-stop)].)
2. Lower the rear seat back.
3. Remove the following parts:
4. Remove fasteners.
am6xuw00007520
|
5. Remove the clips.
am6xuw00007521
|
6. Pull up the rear package trim in the direction of the arrow (1) shown in the figure while remove the guides, pull the rear package trim in the direction of the arrow (2), and remove it.
am6xuw00007522
|
7. Install in the reverse order of removal.