 |
am6zzw00013566
CENTER DISPLAY REMOVAL/INSTALLATION
id092000031300
1. Disconnect the negative battery cable. (See NEGATIVE BATTERY CABLE DISCONNECTION/CONNECTION [SKYACTIV-D 2.2].) (See NEGATIVE BATTERY CABLE DISCONNECTION/CONNECTION [SKYACTIV-G 2.0, SKYACTIV-G 2.5].) (See NEGATIVE BATTERY CABLE DISCONNECTION/CONNECTION [SKYACTIV-G 2.0, SKYACTIV-G 2.5 (WITHOUT i-stop)].)
2. Remove the following parts:
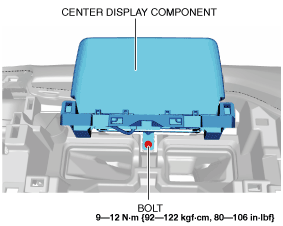
3. Remove the bolt.
am6zzw00013566
|
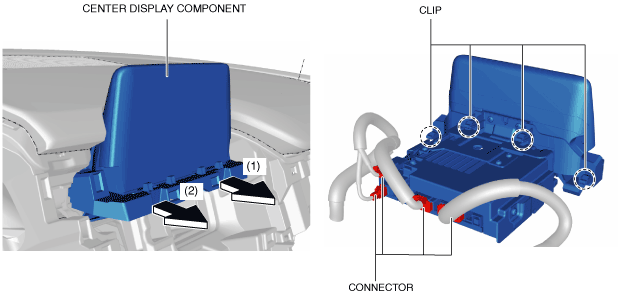
4. Pull the center display component in the order of arrows (1) and (2) shown in the figure, and detach clips from the dashboard.
am6zzw00013567
|
5. Disconnect the connectors.
6. Remove the center display component.
7. Remove the connectivity master unit (CMU). (See CONNECTIVITY MASTER UNIT (CMU) REMOVAL/INSTALLATION.)
8. Install in the reverse order of removal.