 |
am6zzw00014642
CHARGE AIR COOLER REMOVAL/INSTALLATION [SKYACTIV-D 2.2]
id0113z7705900
1. Disconnect the negative battery cable. (See NEGATIVE BATTERY CABLE DISCONNECTION/CONNECTION [SKYACTIV-D 2.2].)
2. Remove the front bumper. (See FRONT BUMPER REMOVAL/INSTALLATION.)
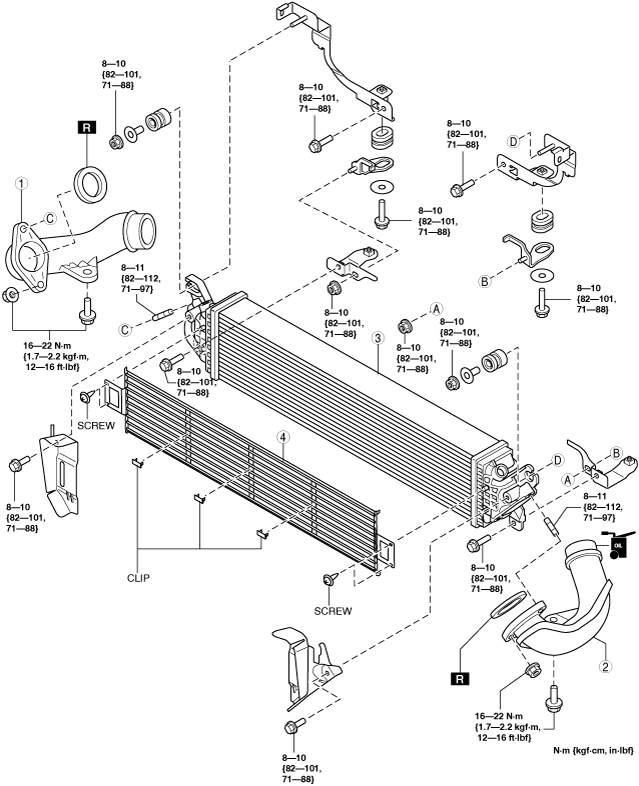
3. Remove in the order shown in the figure.
am6zzw00014642
|
|
1
|
Charge air cooler outlet pipe
|
|
2
|
Charge air cooler inlet pipe
|
|
3
|
Charge air cooler
|
|
4
|
Protector (with protector)
(See Protector Installation Note.)
|
4. Install in the reverse order of removal.
Charge Air Cooler Installation Note
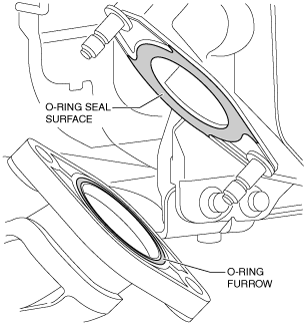
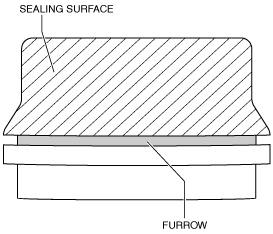
1. Remove foreign matter on the O-ring seal surface of charge air cooler and in the pipe furrow O-ring (sand or dust).
ac5wzw00006729
|
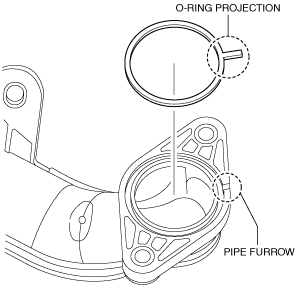
2. Align the O-ring projection with the pipe furrow and install the O-ring.
ac5wzw00006730
|
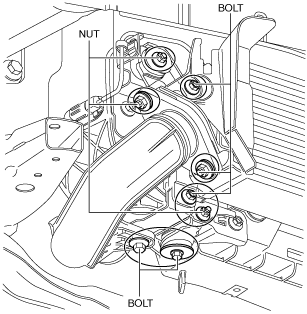
3. Temporarily install the bolts and nuts shown in the diagram.
ac5wzw00005696
|
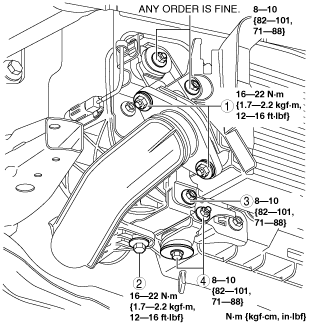
4. Tighten the charge air cooler in the order shown in the figure.
ac5wzw00005279
|
Charge Air Cooler Inlet Pipe Installation Note
1. Clean the seal surface and furrow area of the charge air cooler air inlet pipe.
ac5wzw00006724
|
2. Degrease the seal surface of the pipe, and verify if there is foreign matter penetration or scratches.
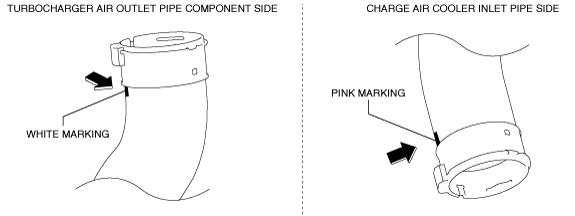
3. Apply engine oil to the seal surface of the pipe.
ac5wzw00006725
|
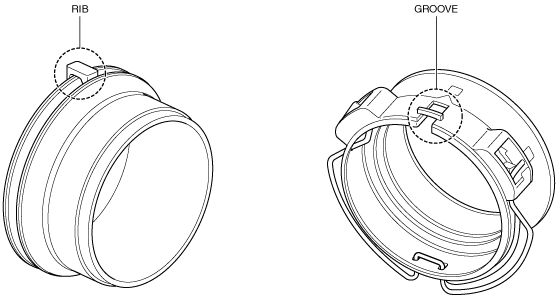
4. Align the pipe rib and connector groove positions, and install.
ac5wzw00006726
|
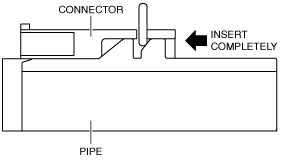
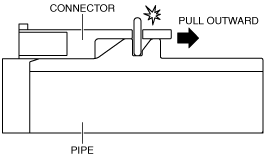
5. Insert the pipe connector completely into the connector.
ac5wzw00006727
|
6. Pull the pipe outward and verify that a click sound is heard.
ac5wzw00006728
|
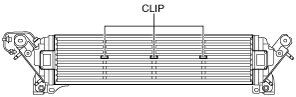
Protector Installation Note
1. Securely insert the clips to the charge air cooler firmly to the back so that they are inserted at the triangular marks in the central area of the vertical bar of the protector.
am6zzw00014643
|