 |
am6zzw00014133
REMOTE HANDLE LEVER REMOVAL/INSTALLATION
id091300809300
4SD
1. Open the trunk lid.
2. Fold the rear seat back.
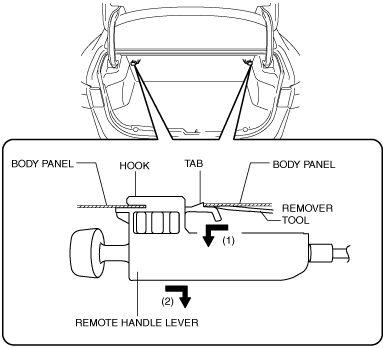
3. Move the remover tool in the direction of arrow (1) shown in the figure and detach the tab.
am6zzw00014133
|
4. Pull the hook in the direction of arrow (2) shown in the figure and remove the remote handle lever.
5. Disconnect the negative battery cable. (See NEGATIVE BATTERY CABLE DISCONNECTION/CONNECTION [SKYACTIV-D 2.2].)(See NEGATIVE BATTERY CABLE DISCONNECTION/CONNECTION [SKYACTIV-G 2.0, SKYACTIV-G 2.5].) (See NEGATIVE BATTERY CABLE DISCONNECTION/CONNECTION [SKYACTIV-G 2.0, SKYACTIV-G 2.5 (WITHOUT i-stop)].)
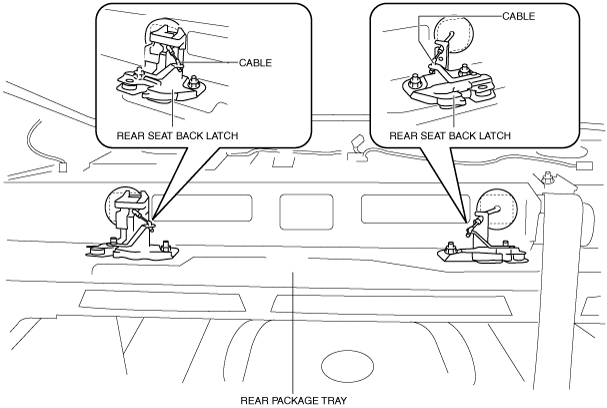
6. Remove the following parts:
7. Disconnect the cable from the rear seat back latch.
am6zzw00012478
|
8. Remove the remote handle lever.
9. Install in the reverse order of removal.
WGN
1. Disconnect the negative battery cable. (See NEGATIVE BATTERY CABLE DISCONNECTION/CONNECTION [SKYACTIV-D 2.2].)(See NEGATIVE BATTERY CABLE DISCONNECTION/CONNECTION [SKYACTIV-G 2.0, SKYACTIV-G 2.5].) (See NEGATIVE BATTERY CABLE DISCONNECTION/CONNECTION [SKYACTIV-G 2.0, SKYACTIV-G 2.5 (WITHOUT i-stop)].)
2. Fold the rear seat back.
3. Remove the following parts:
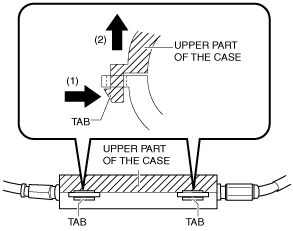
4. Press the tab in the direction of arrow (1) shown in the figure to disengage it, and open the upper part of the case in the direction of arrow (2).
am6zzw00012375
|
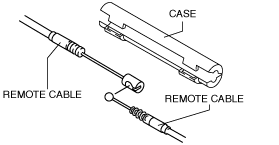
5. Disconnect the remote cable.
am6zzw00012376
|
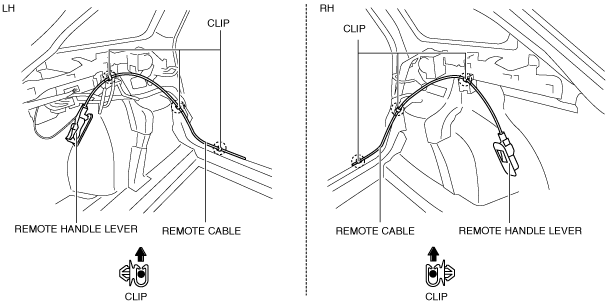
6. Remove the remote cable on the remote handle lever side from the clips.
am6zzw00012377
|
7. Install in the reverse order of removal.
8. Pull the remote handle lever and verify that the rear seat back is unlocked.
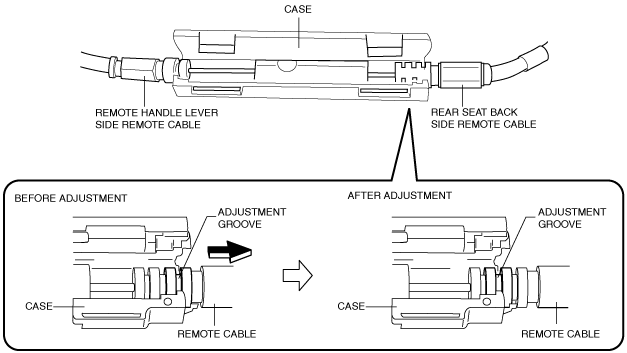
Remote Cable Adjustment
1. Fold the rear seat back.
2. Remove the trunk covering. (See TRUNK COVERING REMOVAL/INSTALLATION.)
3. Remove the trunk board. (See TRUNK BOARD REMOVAL/INSTALLATION.)
4. Press the tab in the direction of arrow (1) shown in the figure to disengage it, and open the upper part of the case in the direction of arrow (2).
am6zzw00012375
|
5. Move the position of the remote cable adjustment groove on the rear seat back side one step in the direction of the arrow shown in the figure.
am6zzw00012378
|
6. Close the case.
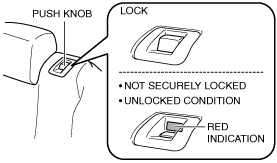
7. Move the rear seat back to its upright position and verify that the red indication cannot be seen on the push knob.
am6zzw00012379
|
8. Pull the remote handle lever and verify that the rear seat back is unlocked.
9. Install the trunk board. (See TRUNK BOARD REMOVAL/INSTALLATION.))
10. Install the trunk covering. (See TRUNK COVERING REMOVAL/INSTALLATION.)