 |
am6zzw00013581
GLOBAL POSITIONING SYSTEM (GPS) ANTENNA REMOVAL/INSTALLATION
id092000801500
Without Mazda ERA-GLONASS
1. Disconnect the negative battery cable. (See NEGATIVE BATTERY CABLE DISCONNECTION/CONNECTION [SKYACTIV-D 2.2].) (See NEGATIVE BATTERY CABLE DISCONNECTION/CONNECTION [SKYACTIV-G 2.0, SKYACTIV-G 2.5].) (See NEGATIVE BATTERY CABLE DISCONNECTION/CONNECTION [SKYACTIV-G 2.0, SKYACTIV-G 2.5 (WITHOUT i-stop)].)
2. Remove the following parts:
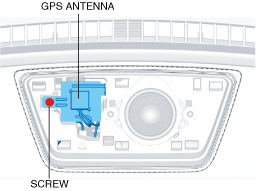
3. Remove the screw.
am6zzw00013581
|
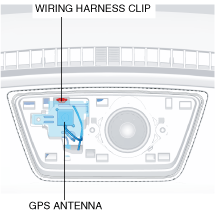
4. Pull out the wiring harness clip.
am6zzw00013582
|
5. Remove the GPS antenna.
6. Install in the reverse order of removal.
With Mazda ERA-GLONASS
1. Disconnect the negative battery cable. (See NEGATIVE BATTERY CABLE DISCONNECTION/CONNECTION [SKYACTIV-G 2.0, SKYACTIV-G 2.5].)(See NEGATIVE BATTERY CABLE DISCONNECTION/CONNECTION [SKYACTIV-G 2.0, SKYACTIV-G 2.5 (WITHOUT i-stop)].)(See NEGATIVE BATTERY CABLE DISCONNECTION/CONNECTION [SKYACTIV-D 2.2].)
2. Remove the following parts:
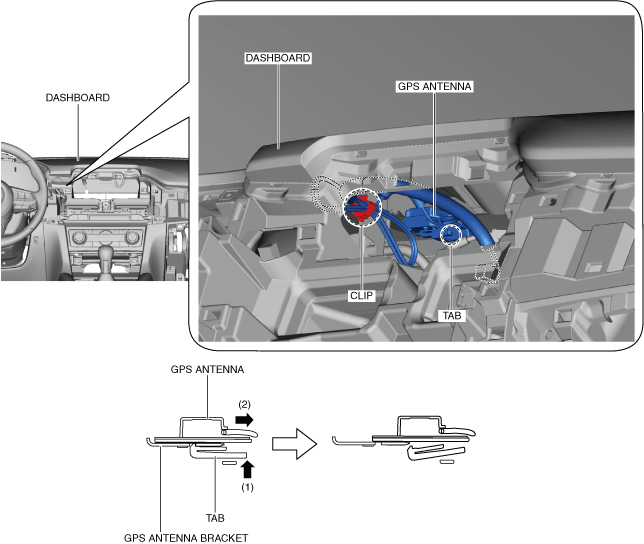
3. Remove the clip.
am6zzw00015481
|
4. While pressing the tab in the direction of arrow (1), move the GPS antenna in the direction of arrow (2) shown in the figure .
5. Remove the GPS antenna.
6. Install in the reverse order of removal.