 |
am6zzw00013584
CENTER ROOF ANTENNA REMOVAL/INSTALLATION
id092000801600
1. Disconnect the negative battery cable. (See NEGATIVE BATTERY CABLE DISCONNECTION/CONNECTION [SKYACTIV-D 2.2].) (See NEGATIVE BATTERY CABLE DISCONNECTION/CONNECTION [SKYACTIV-G 2.0, SKYACTIV-G 2.5].) (See NEGATIVE BATTERY CABLE DISCONNECTION/CONNECTION [SKYACTIV-G 2.0, SKYACTIV-G 2.5 (WITHOUT i-stop)].)
2. Remove the following parts:
3. Remove the rear passenger's assist handle. (See ASSIST HANDLE REMOVAL/INSTALLATION.)
4. Remove the cargo net hook (with cargo net hook)(See HEADLINER REMOVAL/INSTALLATION.)
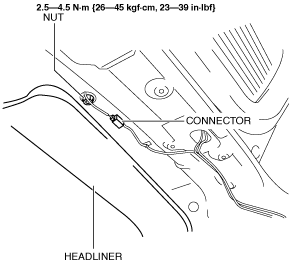
5. Partially peel back the headliner.
6. Disconnect the connector. (with audio system)
am6zzw00013584
|
7. Remove the nut.
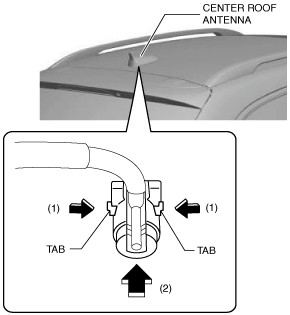
8. While pressing the center roof antenna tabs in the direction of arrows (1) shown in the figure, press the center roof antenna in the direction of arrow (2) to detach the center roof antenna tabs from the body.
am6zzw00013585
|
9. Remove the center roof antenna.
10. Install in the reverse order of removal.