 |
am6zzw00014139
REAR SPEAKER REMOVAL/INSTALLATION
id092000802400
4SD
1. Disconnect the negative battery cable. (See NEGATIVE BATTERY CABLE DISCONNECTION/CONNECTION [SKYACTIV-D 2.2].) (See NEGATIVE BATTERY CABLE DISCONNECTION/CONNECTION [SKYACTIV-G 2.0, SKYACTIV-G 2.5].) (See NEGATIVE BATTERY CABLE DISCONNECTION/CONNECTION [SKYACTIV-G 2.0, SKYACTIV-G 2.5 (WITHOUT i-stop)].)
2. Remove the following parts:
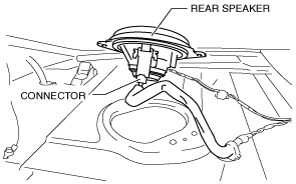
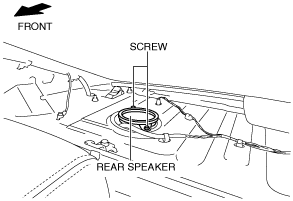
3. Remove the screws.
am6zzw00014139
|
4. Remove the rear speaker.
5. Disconnect the connector.
am6zzw00014140
|
6. Install in the reverse order of removal.
WGN
1. Disconnect the negative battery cable. (See NEGATIVE BATTERY CABLE DISCONNECTION/CONNECTION [SKYACTIV-D 2.2].) (See NEGATIVE BATTERY CABLE DISCONNECTION/CONNECTION [SKYACTIV-G 2.0, SKYACTIV-G 2.5].) (See NEGATIVE BATTERY CABLE DISCONNECTION/CONNECTION [SKYACTIV-G 2.0, SKYACTIV-G 2.5 (WITHOUT i-stop)].)
2. Remove the following parts:
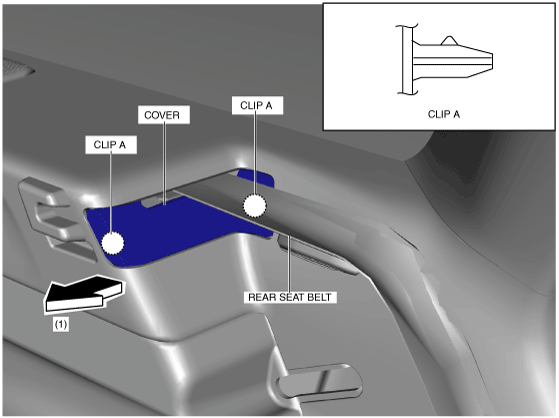
3. Remove the cover in the direction of arrow (1) shown in the figure while detaching clips A.
am6zzw00011498
|
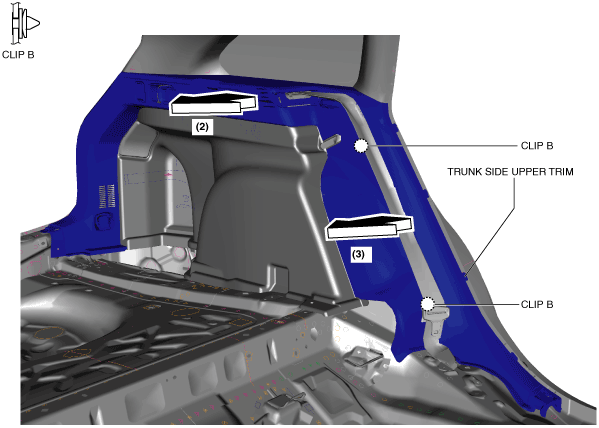
4. Set the rear seat belt aside.
5. Pull the trunk side upper trim in the direction of the arrow in the order of (2), (3) and remove it while detaching clips B.
am6zzw00011499
|
6. Partially peel back the trunk side upper trim. (See TRUNK SIDE UPPER TRIM REMOVAL/INSTALLATION.)
7. Remove the screws.
am6zzw00010885
|
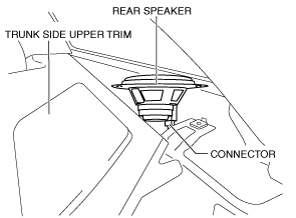
8. Remove the rear speaker.
9. Disconnect the connector.
am6zzw00010886
|
10. Install in the reverse order of removal.